
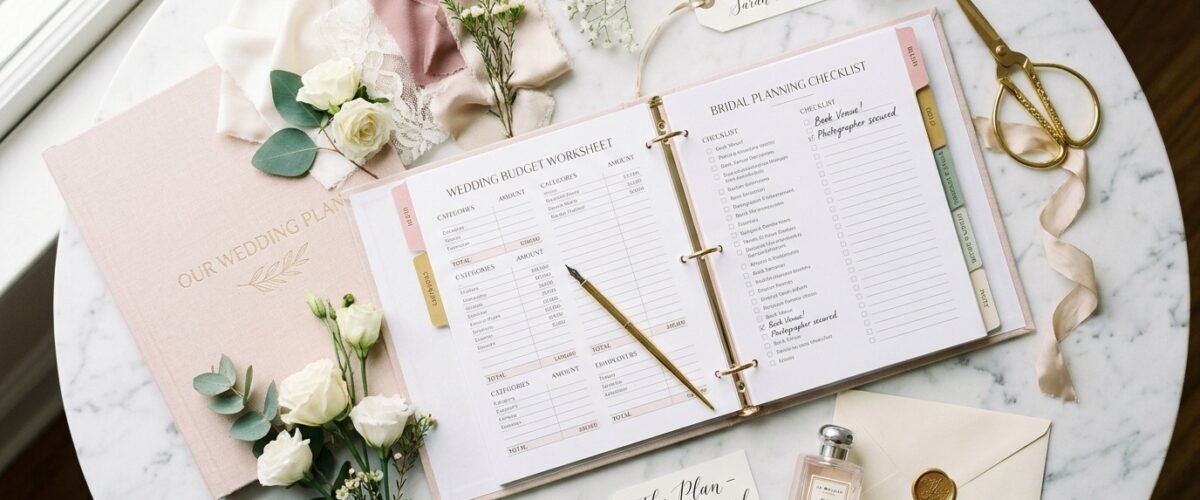
A complete bridal book requires a sturdy two-inch three-ring binder divided into eight clear color-coded sections. You should assemble your planning binder within two weeks of getting engaged. In fact, many couples rely only on phone planning apps and shared online folders. However, cell service often drops in rural barns. It also fails in stone venues. In addition, phone batteries drain fast. A twelve-hour wedding day drains any battery. In contrast, a paper planning book gives you instant access to signed vendor contracts and timeline sheets.
I have guided hundreds of couples through wedding plans over fourteen years as a lead wedding planner. In fact, wedding day mistakes happen when key paperwork stays buried on a dead phone. When you build a structured bridal book, you hold every contract in your hands. You also hold every floor plan and phone number. Your wedding crew knows what to do. This complete guide shows you how to choose binder supplies, organize eight core sections, and build a reliable planning system for your wedding.
Master Bridal Book Structure: The 8-Tab Binder system
First, set up your binder using a proven eight-tab system before you print vendor quotes. A clean layout protects your peace of mind. In fact, you can flip to any contract in five seconds flat.
Master Binder system and Section Matrix
| Tab Number. | Section Title. | Key sheets Inside. | Check Timing. | Lead planner Advice. |
|---|---|---|---|---|
| Tab 1. | Master Timeline and Contacts. | Run of show, vendor contact sheet, and VIP phone list. | Weekly checks. | Print five clean copies for wedding week hand-offs. |
| Tab 2. | Budget and Payment Tracking. | Master budget, payment slips, and cash tipping guide. | Monthly checks. | Keep signed slips right behind each vendor invoice. |
| Tab 3. | Venue Contracts and Floor Plans. | Rental deal, seating charts, and rain plan maps. | Quarterly checks. | Highlight load-in hours and curfew rules in yellow ink. |
| Tab 4. | food and Bar Menus. | Tasting notes, final guest counts, and allergy lists. | Bi-weekly checks. | Circle vegetarian and gluten-free table numbers clearly. |
| Tab 5. | Photo and Video Shot Lists. | Family photo shot lists, timeline shots, and permit forms. | Two weeks prior. | Cap formal family groupings at twelve to save cocktail hour. |
| Tab 6. | Attire and fitting slips. | Dress slips, bustle diagrams, and suit order numbers. | Monthly checks. | Insert clear photo steps showing how to hook the bustle. |
| Tab 7. | Floral and Decor list. | Florist quotes, table floral sketches, and packing lists. | Monthly checks. | Note which family members take floral table florals home. |
| Tab 8. | Music, Vows, and Speeches. | DJ cue sheets, ceremony script, and reader printed cards. | Final month. | Print reader texts in large sixteen-point bold type. |
Related: Maid of Honor Planner: Complete Duty Checklist, Timeline, and Speech Guide
Essential Supplies: Choosing the Right Binder, tabs, and Pockets
First, pick durable supplies that hold up through twelve months of heavy planning. Flimsy discount binders tear open and drop slips on venue floors.
sturdy D-Ring Binders vs Standard Round Rings
First, buy a two-inch sturdy D-ring binder rather than a round-ring model. D-ring binders let pages lie flat on conference tables. Next, D-rings hold thirty percent more paper without jamming. Look for a binder with a clear front sleeve. Then, slide in a custom cover sheet with your wedding date. Also, choose a water-resistant vinyl cover that wipes clean if drinks spill during vendor meetings.
Heavyweight Plastic Sheet sleeves and Zipper Pouches
Next, purchase a box of one hundred heavyweight non-glare sheet sleeves. Never hole-punch original signed contracts. Instead, slip every contract into a clean plastic sleeve to guard paper against tears and spills. Also, add two clear vinyl zipper pouches to the front of your binder. Use these pouches to hold business cards, fabric swatches, paint chips, and extra pens.
wide Color-Coded Tabs
Finally, invest in wide plastic tabs with reinforced holes. Standard tabs get hidden inside plastic sleeves. In contrast, wide index tabs extend past sleeves so you can read section labels easily. In contrast, wide index tabs extend past sheet sleeves. You can read section labels easily. Use bold color-coded tabs. They mark your eight core planning zones with ease.
Tab 1: Master Timeline, Run of Show, and Vendor Contacts
Your first binder tab serves as the command center for wedding day execution. Keeping these schedules organized protects your morning flow and prevents delays.
The Hour-by-Hour Master Wedding Timeline
First, place your master wedding day timeline at the very front of Tab 1. This sheet lists every date from morning hair prep to midnight cleanup. Next, break your day into fifteen-minute blocks. Break your day into fifteen-minute blocks. Include exact start times for photo sessions, the ceremony processional, cocktail hour, dinner service, and dancing. Also, note who is in charge of each activity so tasks get done on time.
Vendor Arrival and Load-In Schedules
Next, include a dedicated vendor arrival schedule. List load-in times for your florist and rental crew. Also, note times for your caterer, DJ, and cake baker. For example, rental companies need two hours to set up chairs and tables before florists arrive. Having clear setup windows stops vendors from crowding venue loading docks at the same time.
VIP Family and Wedding Party Contact Directory
Finally, add a complete contact sheet for your wedding party and immediate family. List cell phone numbers, hotel room numbers, and assigned wedding duties. If a groomsman misplaces his bow tie, your planner can call him straight away. In fact, having all key numbers on one printed page saves precious time on wedding morning. Having all key numbers on one printed page saves precious time on wedding morning.
Tab 2: Budget sheets, Payment dates, and Tips
Tab 2 keeps your wedding finances transparent and organized. Tracking payments methodically protects your bank account and avoids surprise fees.
Master Budget plan sheet
First, file your master budget plan worksheet under Tab 2. Track estimated expenses against actual contract costs. In addition, allocate forty-five to fifty percent for venue, food, and bar. Standard budgets allocate forty-five to fifty percent for venue, food, and bar. In addition, allocate twelve to fifteen percent for photo and video. Check this sheet monthly to catch cost overruns early.
down payment Due Dates and Signed Payment slips
Next, create a payment date calendar listing due dates for final checks. Most wedding vendors require a fifty percent down payment at signing and the remaining balance thirty days before the wedding. File signed slips behind each vendor invoice as down payments get paid. Therefore, having proof of payment ready prevents awkward billing disputes on wedding week. Having proof of payment ready prevents awkward billing disputes on wedding week.
Cash Tipping slip order
Finally, insert a dedicated cash tipping chart. List each vendor, the standard tip amount, and the person designated to hand out slips. For example, give fifty to one hundred dollars to each lead food captain and twenty-five dollars to delivery drivers. Prepare cash slips during wedding week and store them in your binder for safe delivery.
Tab 3: Venue Contracts, Layouts, and Weather Plans
Tab 3 houses your venue rental terms, layout sketches, and safety rules. These sheets protect your site access and keep guests comfortable.
Venue Contract Rules and Load-In Deadlines
First, store your signed venue rental deal in Tab 3. Highlight critical contract rules in yellow ink. In fact, highlight load-in windows, sound curfews, and candle safety rules. If your contract states music must stop at ten o’clock, schedule your grand exit for nine-thirty. In short, respecting venue rules protects your down payment from penalty fees. Respecting venue rules protects your security down payment from penalty fees.
Floor Plans and Table Seating Charts
Next, add printed copies of your party floor plan and table seating charts. Mark the exact placement of dining tables and the dance floor. Also, mark bar stations and DJ booths. In addition, note power outlet locations for your music. A clear floor plan helps rental crews place tables correctly on the first try.
Bad-Weather Rain Call backup Protocols
Finally, include a detailed bad-weather backup floor plan. The contract must state your rain-call deadline, which is usually three hours before ceremony start time. If morning rain occurs, an indoor layout saves the day. In fact, staff can move chairs inside smoothly without panic. Clear plans prevent panic when outdoor skies look dark.
Tab 4: food Menus, Dietary Sheets, and Bar Formulas
Tab 4 makes sure catering runs on time and guests enjoy their meals. Organizing food details avoids service bottlenecks and protects guests with allergies.
Final Tasting Notes and Course Orders
First, place your food contract and final tasting notes under Tab 4. File your confirmed guest count and food lists. In addition, note your plated dinner picks. Note the exact service style, whether plated, family-style, or buffet. Plated dinners require one server for every fifteen to twenty guests to keep meal service prompt and hot.
Dietary Allergies and Table Number Callouts
Next, create an itemized dietary restriction sheet. List guest names, severe food allergies, and their assigned table numbers. Circle vegetarian, vegan, and gluten-free meals clearly. Give a clean copy of this sheet to your food captain during morning briefing. In addition, careful meal tracking keeps sensitive guests safe and well-fed. Careful meal tracking keeps sensitive guests safe and well-fed.
The party Drink Formula and Bar Staff Ratios
Finally, file your beverage formulas and bar staffing notes. Standard planning allows one drink per guest per hour of party time. In addition, budget one drink per guest for cocktail hour. For one hundred guests over five hours, budget five hundred total drinks. Staff one bartender for every fifty guests for full cocktail bars. In contrast, staff one per seventy-five for beer and wine only.
Tab 5: photo Shot Lists and Portrait Timing
Tab 5 guides your media team and preserves family memories. A well-organized shot list keeps portrait sessions running on schedule.
Formal Family Portrait Grouping Limits
First, file your structured family formal shot list in Tab 5. Limit family portrait groupings to ten or twelve groups. Each grouping takes three minutes to gather and shoot. As a result, twelve groupings require thirty-six minutes. If you exceed twelve groupings, your cocktail hour disappears and dinner service falls behind schedule.
Couple Portraits and First Look Windows
Next, budget forty-five to sixty minutes for your first look and couples portraits. Schedule this photo window before the vows begins. In fact, your hair and makeup look fresh early in the day. In addition, assign a bridesmaid to carry your gown train and bouquet during outdoor photos. Finishing couples portraits early lets you enjoy cocktail hour with guests.
The party Decor and Detail Shot List
Finally, list the party detail photos you want shot before guests enter the room. Include table florals, place settings, the wedding cake, and floral installations. Schedule fifteen minutes for your photographer to shoot the empty party room. In fact, this window makes sure you get crisp photos of your design before chairs move. This brief window makes sure you get crisp photos of your design before chairs get moved.
Tab 6: Attire Orders, fitting slips, and Bustle Steps
Tab 6 tracks wardrobe details, fittings progress, and day-of dressing steps. Proper wardrobe records prevent fitting urgent needs on wedding morning.
Gown Fitting Dates and fitting slips
First, keep all bridal salon orders, veil slips, and fitting deals under Tab 6. File your fitting dates. Standard bridal fittings take eight to twelve weeks across three appointments. File slips showing down payment balances so you know what is due at final pickup. Also, note the shop phone number in case you need last-minute seam fixes.
Step-by-Step Gown Bustle Photo steps
Next, insert clear photo steps showing how to fasten your wedding gown bustle. Take photos of your seamstress hooking each point during your final fitting visit. Next, have your maid of honor study these photos. Have your maid of honor study these photos. Fastening a multi-point bustle takes ten to fifteen minutes. Clear photo steps help your attendant secure your train quickly before dinner.
Wedding Party Attire Sizes and Tracking
Finally, track attire orders for your bridesmaids, groomsmen, and ring bearers. File color codes, fabric names, and shoe guidelines for each attendant. In addition, note tuxedo pickup dates for groomsmen to make sure everyone tries on suits forty-eight hours before the vows. Early try-ons leave time to swap ill-fitting jackets or trousers. In short, testing suits early prevents wardrobe stress on wedding morning.
Tab 7: Floral Mockups, Decor list, and Setup Layouts
Tab 7 organizes your visual design elements and decor plans. Tracking list carefully prevents misplaced items and simplifies end-of-night cleanup.
Floral quotes and table floral Sketches
First, store your floral quote and itemized table floral list in Tab 7. Include printed sketches or sample photos of your own bouquets, boutonnieres, and ceremony arch arrangements. In addition, file fabric swatches so your florist matches bouquet ribbons to bridesmaid dresses. Clear floral notes make sure ceremony arches and table arrangements match your vision.
own Decor Packing List and Box Labeling System
Next, create an itemized packing list of couple-provided decor items. List guest book pens, table numbers, card boxes, photo frames, and memorial candles. Pack items in clear plastic storage tubs labeled by location. For example, label tubs for Welcome Table or Bar. Clear box labels help setup helpers place items quickly without asking questions.
End-of-Night Decor Cleanup Assignments
Finally, assign specific family members or friends to pack up your own decor at midnight. Venues often require rooms to be clear within one hour of party end. Therefore, note who collects the card box, gifts, guest book, and cake. Note who collects the card box, wedding gifts, guest book, and leftover wedding cake. Having designated helpers makes sure your belongings travel home safely.
Tab 8: Music Cues, Processional Script, and Toasts
Tab 8 controls the flow, sound, and spoken moments of your wedding day. Organizing musical cues makes sure your vows and dance floor run smoothly.
DJ and Band vows and party Cue Sheets
First, place your music cue sheet at the front of Tab 8. List exact song titles and artist names for key moments. Include processional songs, the bridal entrance, the recessional, grand entrance, first dance, and parent dances. In addition, create a clear do-not-play list so your DJ avoids unwanted tracks during open dancing.
Officiant Script, vows Readings, and Written Vows
Next, file the complete ceremony script, reader picks, and own vows. Print reader picks in large sixteen-point bold type on cardstock. In fact, large print helps readers deliver passages clearly without squinting. Large print helps readers deliver passages clearly without squinting. Also, keep printed copies of your own vows in Tab 8 as a backup in case vow books get misplaced.
Toast Schedules and Microphone Rules
Finally, list the speech schedule and speaker order. Limit toasts to three speakers, such as the maid of honor, best man, and parents of the couple. Cap each speech at three minutes to keep dinner service moving. Remind speakers to stand near the center of the room and speak directly into the microphone for clear sound.
online Wedding Planning vs paper Bridal Books
While online sheets offer ease, paper binders provide unmatched reliability. Knowing the benefits of both formats helps you plan with total confidence.
Why Cloud Apps Fail in Rural and Historic Wedding Venues
First, know why online wedding apps often fail on wedding day. Historic estates, rustic barns, and remote mountain venues frequently sit in cellular dead zones. When cell signals drop, online sheets become unreachable. In contrast, a paper binder works anywhere without Wi-Fi, passwords, or battery power. In contrast, a paper binder works anywhere without Wi-Fi, passwords, or battery power.
How paper Paper Protects You During Vendor Disputes
Next, consider contract accountability during vendor setup. If a venue manager claims tables must clear by ten o’clock, you can flip open your binder. Showing the signed deal with an eleven o’clock cutoff resolves disputes in seconds. In short, having ink on paper eliminates confusion on site. Having ink on paper eliminates confusion and protects your financial rights on site.
The Hybrid Model: Syncing Cloud Backups with Paper Binders
Finally, adopt a balanced hybrid planning system. Use shared cloud drives to collect online files, guest addresses, and budget checks during early planning phases. Once you finalize vendor contracts and floor plans, print clean paper copies for your binder. A hybrid method gives you handy online sharing plus fail-safe paper backup.
The Wedding Week Hand-Off: Transferring Your Bridal Book to Your planner
Two weeks before your vows, transfer your binder to your wedding planner or venue director. A thorough hand-off allows your team to manage plans smoothly.
The Final sheet Audit at T-14 Days
First, conduct a complete binder audit fourteen days before the wedding. Verify that every vendor deal includes a signed final page. Next, confirm that the page reflects your final guest count. Next, check that your timeline lists accurate arrival windows for hair stylists, florists, and rental crews. Discard outdated draft drafts so only current schedules remain in the binder.
Highlighting Critical Deadlines for the Rehearsal Director
Next, use colored highlighter pens to flag critical written deadlines. Highlight ceremony start times, room turnover windows, and food cut-offs. Walk through the binder page by page with your planner during your final details meeting. Also, point out special family requests so nothing slips through the cracks. Point out special family requests and vendor meal arrangements so nothing slips through the cracks.
urgent Contacts and Cash slip order
Finally, place your labeled vendor tipping slips in the front binder pocket. Write the vendor name and tip amount on each slip. In addition, note delivery timing on each slip. In addition, include cash slips for remaining balance payments due on wedding day. Handing these organized slips to your planner makes sure vendors get tips without bothering you.
Post-Wedding Keepsake shift: Preserving Your Bridal Book
After your wedding wraps up, your binder turns into a cherished family heirloom. Preserving your planning sheets safeguards sweet memories for future years.
Removing Temporary Notes and Preserving Vows and Cards
First, remove temporary scratch notes, rough drafts, and expired vendor quotes. Replace them with treasured vows keepsakes. Slip your handwritten vows and vows programs into clean sleeves. Also, store your pressed bouquet petals and dinner menus alongside your vows. In addition, store your pressed bouquet petals and custom dinner menus alongside your vows.
Archival-Safe Paper and Acid-Free Sleeves
Next, make sure your binder uses archival-safe materials for long-term storage. Standard plastic sleeves contain acids that degrade paper over time. In contrast, acid-free sleeves preserve paper sheets without damaging ink or ribbons. In contrast, polypropylene sheet sleeves preserve paper sheets without damaging ink or color ribbons. Storing items in acid-free sleeves keeps vows readable for decades.
Storing Your Wedding Binder for Future years
Finally, store your completed binder in a weather-controlled home space. Avoid hot attics, damp basements, or humid garages. Place the binder on an open bookshelf alongside your wedding album. Reopening your planning book on wedding years brings back fond memories of the care you poured into your wedding day.
Building a thorough bridal book turns chaotic wedding planning into a structured, enjoyable experience. By selecting durable supplies, organizing eight core sections, and maintaining printed contracts, you eliminate costly mistakes. Treat your planning binder as your command center, and step into your wedding day with complete peace of mind.
Editorial Note: This article has been researched, written, and fact-checked by our experienced wedding planning team. Every guide is manually reviewed by our lead author to ensure accurate and reliable advice.
Frequently Asked Questions
Hover or tap any question below to reveal the answer.
What size binder is best for a bridal book?
It holds up to four hundred pages, lies flat on tables, and accommodates eight full sections with sheet sleeves.
When should you start assembling your wedding binder?
Setting up sections early makes sure you file contracts, slips, and venue estimates as soon as you get them.
Should you include fabric swatches in your planning book?
Having swatches of bridesmaid dresses and linen colors helps florists and stationers match shades accurately.
How many copies of the wedding day timeline should you print?
Give copies to your photographer, planner, venue manager, maid of honor, and DJ for smooth coordination.
Can a online wedding planning app replace a paper binder?
However, paper binders remain vital because remote venues often lack cell service and phones run out of battery.
Who holds the bridal book on wedding day?
Your team manages the book on wedding day so you enjoy your big day.